
LED Strip Lights for Stairs: The Complete Guide to Safety, Style & Installation
Poorly lit staircases are one of the leading causes of home and workplace accidents. Whether you’re upgrading a residential staircase, illuminating a hotel lobby, or ensuring warehouse safety, LED strip lights offer an energy-efficient, stylish, and cost-effective solution. This complete guide covers everything from placement and installation to smart controls and common mistakes to avoid.
Related: read our hidden led strip lights solutions for elegant lighting design.
Why Choose LED Strip Lights for Stairs?
Enhanced Safety
LED strips provide consistent, shadow-free illumination that dramatically reduces fall risks. Particularly beneficial for elderly family members, children, and individuals with visual impairments navigating stairs at night.
Energy Efficiency
LEDs use up to 80% less energy than traditional halogen or incandescent lights and last up to 50,000 hours. For staircases that require continuous lighting, this means significantly lower electricity bills and fewer replacements.
Design Versatility
Ultra-thin LED strips can be hidden under step nosings, along handrails, or within glass balustrades to create a modern, floating-staircase effect. Available in warm white, cool white, and RGBW color-changing options.

Modern staircase with hidden LED strip lighting under each tread — creates a warm, inviting glow while improving safety.
In commercial and industrial environments, proper stair lighting isn’t just about aesthetics — it’s about compliance. The Health and Safety Executive (HSE) reports that trips, slips, and falls account for approximately 30% of all workplace injuries. Installing LED stair lighting helps businesses meet safety regulations while reducing liability risks.
Where to Install LED Strips on Stairs: 4 Popular Placement Options
The placement of your LED strips significantly impacts both safety and visual appeal. Here are the four most popular and effective installation positions:
1. Under the Step Nosing (Most Popular)
Install the strip along the underside of each step’s front edge (nosing). This casts a soft glow downward onto the tread below, creating a clear visual boundary between steps.
Best for: Residential homes, modern interiors, floating staircases
2. Along the Handrail or Banister
Mount strips underneath or along the handrail to illuminate the path from above. This provides even, shadow-free lighting along the entire staircase run.
Best for: Hotels, restaurants, grand staircases, heritage buildings
3. On the Side Wall or Skirting
Place strips along the wall at skirting board level or within an LED aluminum profile recessed into the wall. This creates a subtle wall-wash effect that guides the eye along the staircase.
Best for: Commercial spaces, offices, minimalist interiors
4. Within Glass Balustrades
For glass-panel staircases, embed strips along the base or top edge of the glass. The light diffuses through the glass, creating a stunning, high-end luminous effect.
Best for: Luxury homes, showrooms, contemporary architecture
Glass balustrade staircase with LED strip lighting — the light diffuses through the glass for a premium, high-end look.
Step-by-Step Installation Guide
Installing LED strip lights on stairs is a straightforward DIY project that typically takes 1–2 hours for a standard staircase. Follow these steps for a professional result:
Professional installation ensures even placement, secure connections, and a clean, hidden-wire finish.
Step 1: Plan Your Layout
Decide on placement (under-nosing, handrail, or side wall). Measure each step carefully and note the total length of strip needed. Plan where the power supply and controller will be located — ideally near a power outlet at the top or bottom of the stairs.
Step 2: Measure and Cut the Strips
Measure each step individually. LED strips can only be cut at the marked cut points (typically every 5cm for 12V strips and every 10cm for 24V strips). Use sharp scissors or a craft knife to cut cleanly through the copper pads. Never cut between the copper pads — this will damage the circuit.
Step 3: Clean and Prep the Surface
Thoroughly clean the installation surface with isopropyl alcohol to remove dust, grease, and debris. A clean surface ensures the 3M adhesive backing bonds properly. For outdoor or high-humidity areas, consider using aluminum channels for extra protection and heat dissipation.
Step 4: Peel and Stick
Peel back the protective film from the 3M adhesive backing. Starting from one end, press the strip firmly onto the surface, working your way along to avoid air bubbles. Apply firm, even pressure for 10–15 seconds per section. For best adhesion, heat the adhesive slightly with a hair dryer before pressing.
Step 5: Connect the Segments
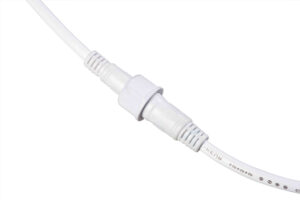
Connect each step’s strip segment to the next using LED strip connectors or short wire jumpers. For under-nosing installation, run the connecting wire along the side or back of the staircase where it won’t be visible. Ensure all connections are secure and properly insulated.
Step 6: Size and Connect the Power Supply
Calculate the total wattage of all strips combined and choose a power supply with at least 20% headroom. For example, if your strips total 40W, use a 50W power supply. For long staircases with many steps, a 24V LED strip is recommended as it experiences less voltage drop over long runs compared to 12V strips.
Step 7: Add a Motion Sensor (Optional but Recommended)
For hands-free convenience and energy savings, install a PIR motion sensor between the power supply and the strips. The sensor will automatically turn the lights on when someone approaches and off after a set delay (typically 30 seconds). This is especially useful for nighttime navigation and for staircases that don’t need constant illumination.
Warm white (2700K–3000K) LED strips on a wooden staircase create a cozy, inviting atmosphere perfect for residential homes.
How to Choose the Right LED Strip for Stairs
Not all LED strips are created equal. Here are the key factors to consider when selecting strips for your staircase project:
Pro Tip: Always choose strips with a CRI (Color Rendering Index) of 80+ for natural-looking illumination. For high-end residential and hospitality projects, look for CRI 90+ strips that render colors more accurately.
Smart Features: Motion Sensors, Dimming & Smart Control
Modern LED stair lighting can be enhanced with smart features that improve convenience, energy efficiency, and user experience:
PIR Motion Sensors
Automatically turns lights on when movement is detected within 3–5m range. Turns off after ~30 seconds of no movement. Perfect for nighttime navigation and energy savings.
Dimmable Controls
Adjust brightness from 1% to 100% to create the perfect atmosphere. Use a dimmer switch, remote control, or smart app to set different brightness levels for day and night.
RGBW Color-Changing
RGBW strips allow you to choose from millions of colors plus pure white. Great for creating dynamic effects in entertainment spaces, holiday lighting, or brand-themed commercial environments.
For businesses, motion sensors and automated dimming can reduce unnecessary energy consumption by up to 60% compared to always-on lighting, making LED stair lighting an eco-friendly and cost-effective choice. Learn more about how to dim LED strip lights.
Common Mistakes to Avoid
❌ Mistake 1: Cutting strips at the wrong point. Always cut at the marked copper pads, never between them. Cutting in the wrong place will damage the circuit and cause sections of the strip to fail.
❌ Mistake 2: Undersizing the power supply. Always choose a power supply with at least 20% more wattage than your total strip load. An undersized supply will cause voltage drop, dimmer lights at the far end, and premature failure.
❌ Mistake 3: Not cleaning the surface before installation. Dust, grease, and moisture prevent the 3M adhesive from bonding properly. Always clean with isopropyl alcohol and ensure the surface is completely dry.
❌ Mistake 4: Using non-waterproof strips outdoors. For exterior staircases, always use IP65+ rated strips and ensure all connections are properly sealed with waterproof connectors or heat shrink tubing.
❌ Mistake 5: Ignoring heat dissipation. LED strips generate heat, especially high-brightness versions. For long runs or enclosed installations, use aluminum channels to dissipate heat and extend the lifespan of your strips.
Frequently Asked Questions
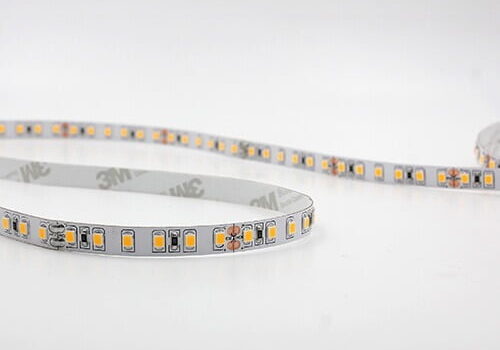
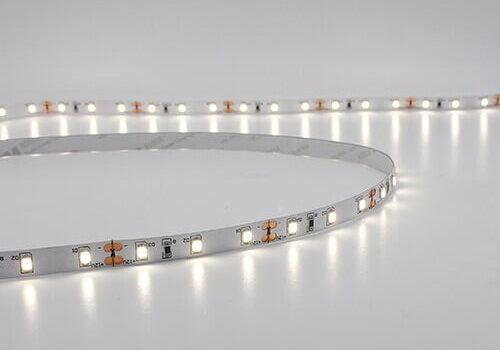
Recommended LED Strip Products for Stairs
Click any product to view full specifications and request a quote:


Ready to Illuminate Your Stairs?
LED strip lights are an investment in safety, energy efficiency, and design. Whether you’re upgrading a residential staircase, enhancing a retail space, or ensuring workplace safety, Lightstec provides high-quality, factory-direct LED strips and accessories tailored to your needs.
Our expert team offers professional guidance, custom specifications, and bulk pricing for projects of any size. Contact Lightstec today for a free consultation and quote.
Learn More Professional Led Classes Which Less People Tell You Before You Make Mistake.
Stair lighting done right — the guide covers the safety and mounting considerations we need for residential and commercial stairs. Great practical read.
Great guide on stairs lighting. Lightstec has supported our projects in the UAE with excellent products and service. The experience has been very positive. We will definitely cooperate again in the future.