
Tiras de luces LED para escaleras: la guía completa de seguridad, estilo e instalación
Las escaleras mal iluminadas son una de las principales causas de accidentes domésticos y laborales. Ya sea que esté mejorando una escalera residencial, iluminando el vestíbulo de un hotel o garantizando la seguridad de un almacén, tiras de luces LED Ofrecer una solución energéticamente eficiente, elegante y rentable. Esta guía completa cubre todo, desde la ubicación y la instalación hasta los controles inteligentes y los errores comunes que se deben evitar.
Relacionado: lee nuestro Soluciones de tiras de luces LED ocultas para un diseño de iluminación elegante.
¿Por qué elegir tiras de luces LED para escaleras?
Seguridad mejorada
Las tiras de LED brindan una iluminación constante y sin sombras que reduce drásticamente el riesgo de caídas. Particularmente beneficioso para familiares de edad avanzada, niños y personas con discapacidad visual que suben escaleras por la noche.
Eficiencia Energética
Los LED consumen hasta 80% menos energía que las luces halógenas o incandescentes tradicionales y duran hasta 50.000 horas. Para escaleras que requieren iluminación continua, esto significa facturas de electricidad significativamente más bajas y menos reemplazos.
Versatilidad del diseño
Las tiras de LED ultrafinas se pueden ocultar debajo de los escalones, a lo largo de los pasamanos o dentro de barandillas de vidrio para crear un efecto moderno de escalera flotante. Disponible en opciones de cambio de color blanco cálido, blanco frío y RGBW.

Escalera moderna con tiras de iluminación LED ocultas debajo de cada escalón: crea un brillo cálido y acogedor al tiempo que mejora la seguridad.
En entornos comerciales e industriales, la iluminación adecuada de escaleras no es sólo una cuestión de estética, sino también de cumplimiento. El Ejecutivo de Salud y Seguridad (HSE) informa que los tropezones, resbalones y caídas representan aproximadamente 30% de todas las lesiones laborales. La instalación de iluminación LED para escaleras ayuda a las empresas a cumplir con las normas de seguridad y al mismo tiempo reduce los riesgos de responsabilidad.
Dónde instalar tiras de LED en las escaleras: 4 opciones de ubicación populares
La ubicación de las tiras de LED tiene un impacto significativo tanto en la seguridad como en el atractivo visual. Estas son las cuatro posiciones de instalación más populares y efectivas:
1. Debajo del escalón (más popular)
Instale la tira a lo largo de la parte inferior del borde frontal de cada escalón (borde). Esto proyecta un suave brillo hacia abajo sobre la banda de rodadura de abajo, creando un límite visual claro entre los escalones.
Lo mejor para: Casas residenciales, interiores modernos, escaleras flotantes.
2. A lo largo del pasamano o barandilla
Monte tiras debajo o a lo largo del pasamanos para iluminar el camino desde arriba. Esto proporciona una iluminación uniforme y sin sombras a lo largo de todo el tramo de escalera.
Lo mejor para: Hoteles, restaurantes, grandes escaleras, edificios patrimoniales.
3. En la pared lateral o rodapié
Coloque las tiras a lo largo de la pared al nivel del rodapié o dentro de un perfil de aluminio LED empotrado en la pared. Esto crea un sutil efecto de lavado de pared que guía la vista a lo largo de la escalera.
Lo mejor para: Espacios comerciales, oficinas, interiores minimalistas.
4. Dentro de barandillas de vidrio
Para escaleras con paneles de vidrio, incruste tiras a lo largo de la base o del borde superior del vidrio. La luz se difunde a través del cristal, creando un impresionante efecto luminoso de alta gama.
Lo mejor para: Casas de lujo, showrooms, arquitectura contemporánea.
Escalera con balaustrada de vidrio con tira de iluminación LED: la luz se difunde a través del vidrio para una apariencia premium y de alta gama.
Guía de instalación paso a paso
La instalación de tiras de luces LED en las escaleras es un proyecto de bricolaje sencillo que normalmente tarda entre 1 y 2 horas en una escalera estándar. Siga estos pasos para obtener un resultado profesional:
La instalación profesional garantiza una colocación uniforme, conexiones seguras y un acabado de cables limpio y oculto.
Paso 1: planifique su diseño
Decida la ubicación (bajo la nariz, pasamanos o pared lateral). Mida cada paso con cuidado y observe la longitud total de la tira necesaria. Planifique dónde se ubicarán la fuente de alimentación y el controlador, idealmente cerca de una toma de corriente en la parte superior o inferior de las escaleras.
Paso 2: mide y corta las tiras
Mida cada paso individualmente. Las tiras de LED solo se pueden cortar en los puntos de corte marcados (normalmente cada 5 cm para tiras de 12 V y cada 10 cm para tiras de 24 V). Utilice unas tijeras afiladas o un cúter para cortar limpiamente las almohadillas de cobre. Nunca corte entre las almohadillas de cobre. — esto dañará el circuito.
Paso 3: Limpiar y preparar la superficie
Limpie minuciosamente la superficie de instalación con alcohol isopropílico para eliminar el polvo, la grasa y la suciedad. Una superficie limpia garantiza que el adhesivo 3M se adhiera correctamente. Para áreas al aire libre o con mucha humedad, considere usar canales de aluminio para mayor protección y disipación del calor.
Paso 4: pelar y pegar
Retire la película protectora del adhesivo 3M. Comenzando desde un extremo, presione la tira firmemente sobre la superficie, avanzando para evitar burbujas de aire. Aplique una presión firme y uniforme durante 10 a 15 segundos por sección. Para una mejor adhesión, caliente ligeramente el adhesivo con un secador de pelo antes de presionar.
Paso 5: conecte los segmentos
Conecte el segmento de tira de cada paso al siguiente usando Conectores para tiras de LED o puentes de cables cortos. Para la instalación debajo de la nariz, pase el cable de conexión a lo largo del costado o la parte trasera de la escalera donde no sea visible. Asegúrese de que todas las conexiones estén seguras y adecuadamente aisladas.
Paso 6: Dimensione y conecte la fuente de alimentación
Calcule la potencia total de todas las tiras combinadas y elija una fuente de alimentación con al menos 20% de espacio libre. Por ejemplo, si sus tiras suman 40W, use una fuente de alimentación de 50W. Para escaleras largas con muchos escalones, un tira de LED de 24V Se recomienda ya que experimenta menos caída de voltaje en recorridos largos en comparación con las tiras de 12 V.
Paso 7: agregue un sensor de movimiento (opcional pero recomendado)
Para comodidad de manos libres y ahorro de energía, instale un sensor de movimiento PIR entre la fuente de alimentación y las regletas. El sensor encenderá las luces automáticamente cuando alguien se acerque y las apagará después de un retraso establecido (normalmente 30 segundos). Esto es especialmente útil para la navegación nocturna y para escaleras que no necesitan iluminación constante.
Las tiras de LED de color blanco cálido (2700 K–3000 K) en una escalera de madera crean una atmósfera acogedora y atractiva, perfecta para viviendas residenciales.
Cómo elegir la tira de LED adecuada para escaleras
No todas las tiras de LED son iguales. Estos son los factores clave a considerar al seleccionar listones para su proyecto de escalera:
Consejo profesional: Elija siempre tiras con un CRI (índice de reproducción cromática) de 80+ para una iluminación de apariencia natural. Para proyectos residenciales y hoteleros de alta gama, busque tiras CRI 90+ que representen los colores con mayor precisión.
Funciones inteligentes: sensores de movimiento, atenuación y control inteligente
La iluminación LED moderna para escaleras se puede mejorar con funciones inteligentes que mejoran la comodidad, la eficiencia energética y la experiencia del usuario:
Sensores de movimiento PIR
Enciende automáticamente las luces cuando se detecta movimiento dentro de un rango de 3 a 5 m. Se apaga después de ~30 segundos sin movimiento. Perfecto para navegación nocturna y ahorro energético.
Controles regulables
Ajuste el brillo del 1% al 100% para crear la atmósfera perfecta. Utilice un regulador de intensidad, un control remoto o una aplicación inteligente para establecer diferentes niveles de brillo para el día y la noche.
Cambio de color RGBW
Las tiras RGBW te permiten elegir entre millones de colores además del blanco puro. Ideal para crear efectos dinámicos en espacios de entretenimiento, iluminación navideña o entornos comerciales con temas de marca.
Para las empresas, los sensores de movimiento y la atenuación automática pueden Reducir el consumo innecesario de energía hasta en un 60%. en comparación con la iluminación siempre encendida, lo que hace que la iluminación LED para escaleras sea una opción ecológica y rentable. Más información sobre cómo atenuar las tiras de luces LED.
Errores comunes que se deben evitar
❌ Error 1: Cortar tiras en el punto equivocado. Corte siempre por las almohadillas de cobre marcadas, nunca entre ellas. Cortar en el lugar equivocado dañará el circuito y provocará que fallen secciones de la tira.
❌ Error 2: Subdimensionar la fuente de alimentación. Elija siempre una fuente de alimentación con al menos un 20 % más de potencia que la carga total de su tira. Un suministro de tamaño insuficiente provocará una caída de voltaje, luces más tenues en el otro extremo y fallas prematuras.
❌ Error 3: No limpiar la superficie antes de la instalación. El polvo, la grasa y la humedad impiden que el adhesivo 3M se adhiera correctamente. Limpie siempre con alcohol isopropílico y asegúrese de que la superficie esté completamente seca.
❌ Error 4: Utilizar tiras no impermeables en exteriores. Para escaleras exteriores, utilice siempre tiras con clasificación IP65+ y asegúrese de que todas las conexiones estén selladas adecuadamente con conectores impermeables o tubos termorretráctiles.
❌ Error 5: Ignorando la disipación de calor. Las tiras de LED generan calor, especialmente las versiones de alto brillo. Para tiradas largas o instalaciones cerradas, utilice canales de aluminio para disipar el calor y prolongar la vida útil de sus tiras.
Preguntas frecuentes
Productos de tiras LED recomendados para escaleras
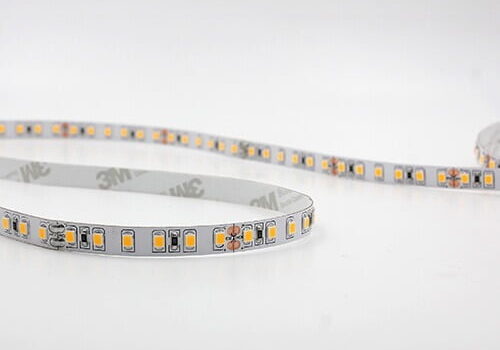
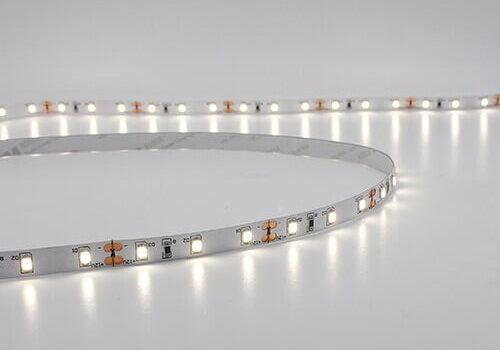
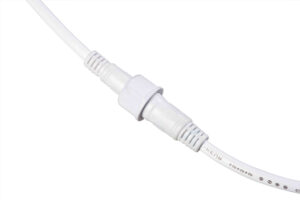
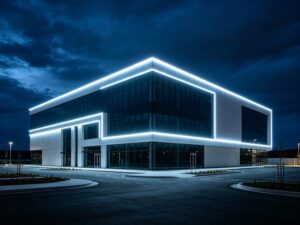
Haga clic en cualquier producto para ver las especificaciones completas y solicitar una cotización:


¿Listo para iluminar tus escaleras?
Las tiras de luces LED son una inversión en seguridad, eficiencia energética y diseño. Ya sea que esté mejorando una escalera residencial, mejorando un espacio comercial o garantizando la seguridad en el lugar de trabajo, Lightstec ofrece tiras LED y accesorios de alta calidad, directos de fábrica, adaptados a sus necesidades.
Nuestro equipo de expertos ofrece orientación profesional, especificaciones personalizadas y precios al por mayor para proyectos de cualquier tamaño. Póngase en contacto con Lightstec hoy para una consulta y cotización gratis.
Obtenga más clases dirigidas por profesionales que menos personas le dirán antes de cometer un error.
Iluminación de escaleras bien hecha: la guía cubre las consideraciones de seguridad y montaje que necesitamos para escaleras residenciales y comerciales. Gran lectura práctica.
Gran guía sobre iluminación de escaleras. Lightstec ha apoyado nuestros proyectos en los Emiratos Árabes Unidos con excelentes productos y servicios. La experiencia ha sido muy positiva. Definitivamente cooperaremos nuevamente en el futuro.