
Why Do LED Strip Lights Stop Working After Cutting?
A Practical Guide by Lightstec (Professional LED Strip Manufacturer)
Cutting LED strip lights is common for custom installations, but improper techniques can lead to malfunctions. As a leading LED strip factory, we explain the technical causes and provide actionable solutions.

- Key Reasons & Fixes
- Preventive Tips from Lightstec
- FAQ
- When to Replace vs. Repair
- Lightstec LED Strip Products
Key Reasons & Fixes
1. Incorrect Cutting Points
LED strips have scissors icons every 3-6 LEDs indicating safe cutting positions. Cutting elsewhere severs internal circuits, causing partial or total failure.
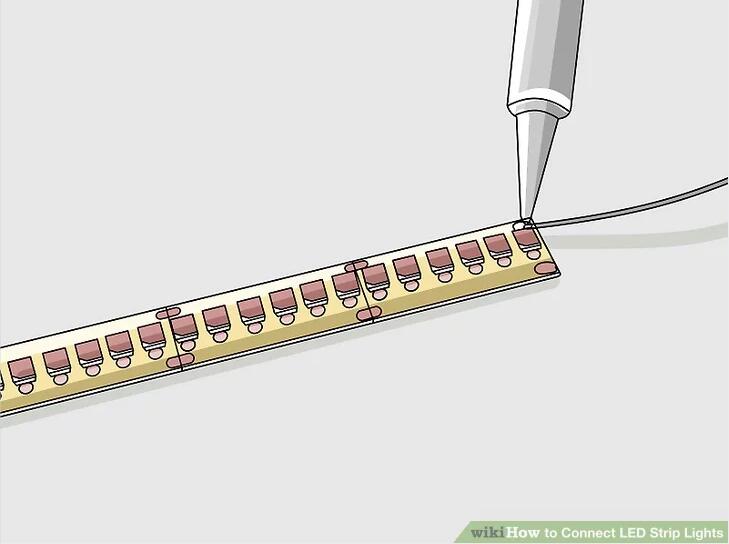
Figere: Use sharp scissors at marked points. For accidental cuts, test continuity with a multimeter and solder broken connections.

2. Circuit Damage or Burned LEDs
Cutting exposes copper pads, which can oxidize or short-circuit. Overloading remaining LEDs after trimming may also burn chips (visible as black spots).
Figere: Insulate cut ends with liquid electrical tape or heat-shrink tubing. Replace burned LEDs by soldering matching 3V chips or bypass them with wire.
3. Power Supply Mismatch
Shortening strips changes voltage requirements. A 12V/5m strip with 60 LEDs = 2.4V per LED. Cutting to 3m means the driver must supply enough current for the shorter load. An undersized driver causes dimming or flicker.
Figere: Recalculate wattage after cutting: LEDs/m × length × W/LED = total watts. Choose a driver with 20% headroom. For long runs, use 24V LED strips to reduce voltage drop.
4. Reverse Polarity or Driver Failure
Reconnecting cut strips with reversed +/- wires can instantly damage LEDs. Faulty drivers (capacitor failure) may also cause intermittent operation.
Figere: Double-check polarity before powering on. Test the driver with a multimeter. Replace faulty drivers with Lightstec matched drivers.

5. Poor Soldering or Connectors
Loose solder joints or low-quality connectors create resistance, leading to dimming or intermittent faults.
Figere: Use rosin-core solder and a 30W iron. Heat both pad and wire, then apply solder. For solderless installs, use quality DUXERIT habena connexiones.
Preventive Tips from Lightstec
- Always test strips with a 3V battery before installation.
- Add aluminium channels for heat dissipation if shortening high-density strips (120+ LEDs/m).
- Seal cut ends with heat-shrink or end caps, especially for IP65+ waterproof strips.
- Use 24V strips for runs over 5m to minimize voltage drop.
- Keep spare connectors and a soldering kit on hand for repairs.
FAQ
When to Replace vs. Repair
Repairable: Minor burns, clean cuts at marked points, functional driver, loose connector, cold solder joints.
Replace: Corroded pads, burnt circuit traces, multiple LED failures in sequence, water damage to IP-rated strips.
Lightstec LED Strip Lights — Factory Direct
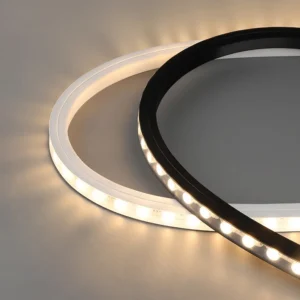
All Lightstec LED strips are designed for clean cutting at marked points, with thick copper PCBs and quality soldering pads. Click any product to view details:


Still Having Trouble with Your LED Strips?
Lightstec engineers provide free technical support — cutting guides, voltage calculators, and custom driver matching.

JerryHu
Conditor Lightstec. Ipsum gradum. 13+ ANNORUM IN DUCIT LUMINEM. Scientiam communicans et solutiones ad DUXERIT illustrandam.
Disce Magis Professio led Classes Quod Minus Populi Dic tibi Ante Erras.
This happened to me! I cut my LED strip and it stopped working. Turns out I cut at the wrong spot. Your guide explains the cut points and reconnection process clearly. The photo showing where to cut is really helpful for DIY users.
This happened to me last weekend! Turns out I also forgot that you need to reconnect the positive and negative wires properly after cutting. The diagram in this article would have saved me an hour of troubleshooting.
Magna lege! Cum HKTDC Accensus Pulchri in Hong Kong appropinquante, multi importatores e Sinis res ductae accedunt. Officinas directas Morbi cursus sapien et OEM/ODM praebemus. Laetus est de cooperatione cum mancipes et de redemptoribus exertis.
As an electrical contractor in Vietnam, I found this article very practical. We specify Lightstec LED products for our installations.