
Por que as fitas de LED param de funcionar após o corte?
Um guia prático da Lightstec (fabricante profissional de tiras de LED)
Cortar fitas de LED é comum em instalações personalizadas, mas técnicas inadequadas podem causar mau funcionamento. Como uma fábrica líder de fitas LED, explicamos as causas técnicas e fornecemos soluções viáveis.

- Principais motivos e soluções
- Dicas preventivas da Lightstec
- Perguntas frequentes
- Quando substituir vs. reparar
- Produtos de tira LED Lightstec
Principais motivos e soluções
1. Pontos de corte incorretos
As tiras de LED possuem ícones de tesoura a cada 3-6 LEDs indicando posições de corte seguras. Cortar em outro lugar interrompe os circuitos internos, causando falha parcial ou total.
Consertar: Use uma tesoura afiada nos pontos marcados. Para cortes acidentais, teste a continuidade com um multímetro e solde as conexões quebradas.

2. Danos no circuito ou LEDs queimados
O corte expõe as almofadas de cobre, que podem oxidar ou causar curto-circuito. Sobrecarregar os LEDs restantes após o corte também pode queimar chips (visíveis como pontos pretos).
Consertar: Isole as extremidades cortadas com fita isolante líquida ou tubo termorretrátil. Substitua os LEDs queimados soldando chips de 3V correspondentes ou contorne-os com fio.
3. Incompatibilidade da fonte de alimentação
Encurtar as tiras altera os requisitos de tensão. Uma faixa de 12V/5m com 60 LEDs = 2,4V por LED. Cortar para 3m significa que o driver deve fornecer corrente suficiente para a carga mais curta. Um driver subdimensionado causa escurecimento ou oscilação.
Consertar: Recalcular a potência após o corte: LEDs/m × comprimento × W/LED = total de watts. Escolha um driver com 20% de headroom. Para corridas longas, use Tiras de LED 24V para reduzir a queda de tensão.
4. Polaridade reversa ou falha do driver
Reconectar tiras cortadas com fios +/- invertidos pode danificar instantaneamente os LEDs. Drivers defeituosos (falha do capacitor) também podem causar operação intermitente.
Consertar: Verifique novamente a polaridade antes de ligar. Teste o driver com um multímetro. Substitua drivers defeituosos por drivers compatíveis com Lightstec.

5. Soldagem ou conectores ruins
Juntas de solda soltas ou conectores de baixa qualidade criam resistência, causando escurecimento ou falhas intermitentes.
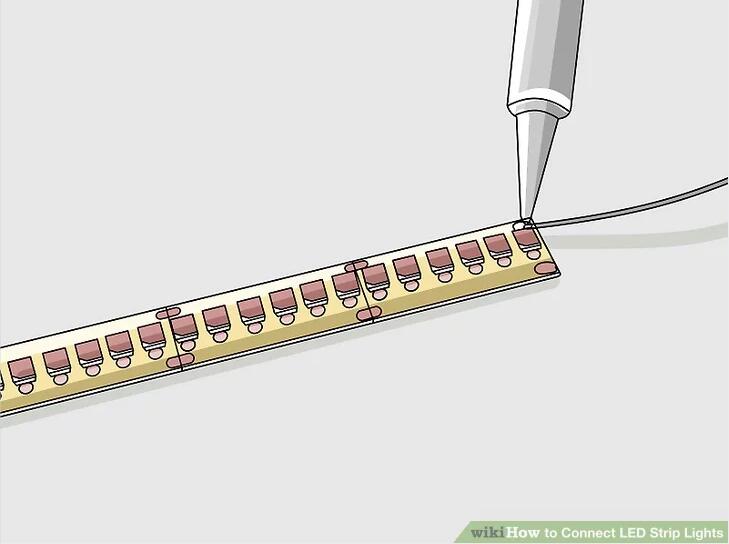
Consertar: Use solda com núcleo de resina e um ferro de 30W. Aqueça a almofada e o fio e aplique a solda. Para instalações sem solda, use qualidade Conectores de tira LED.
Dicas preventivas da Lightstec
- Sempre teste as tiras com uma bateria de 3V antes da instalação.
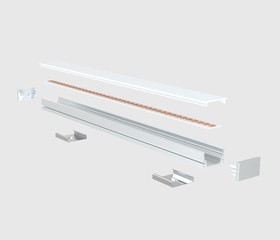
- Adicionar canais de alumínio para dissipação de calor ao encurtar tiras de alta densidade (mais de 120 LEDs/m).
- Vede as extremidades cortadas com tampas termorretráteis ou terminais, especialmente para tiras à prova d'água IP65+.
- Use tiras de 24 V para percursos superiores a 5 m para minimizar a queda de tensão.
- Mantenha conectores sobressalentes e um kit de solda à mão para reparos.
Perguntas frequentes
Quando substituir vs. reparar
Reparável: Queimaduras leves, cortes limpos em pontos marcados, driver funcional, conector solto, juntas de solda fria.
Substituir: Almofadas corroídas, traços de circuito queimados, múltiplas falhas de LED em sequência, danos causados pela água em tiras com classificação IP.
Fitas LED Lightstec – Direto da fábrica
Todas as tiras de LED Lightstec são projetadas para corte limpo em pontos marcados, com PCBs de cobre grossos e almofadas de solda de qualidade. Clique em qualquer produto para ver detalhes:


Ainda tendo problemas com suas tiras de LED?
Os engenheiros da Lightstec fornecem suporte técnico gratuito – guias de corte, calculadoras de tensão e correspondência de driver personalizada.

JerryHu
Fundador da Lighttec. Graduação em engenharia. Mais de 13 anos em iluminação LED. Compartilhando conhecimento e soluções para iluminação LED.
Aprenda mais aulas ministradas por profissionais que menos pessoas lhe dirão antes de você cometer um erro.

Isso aconteceu comigo! Cortei minha faixa de LED e ela parou de funcionar. Acontece que cortei no lugar errado. Seu guia explica claramente os pontos de corte e o processo de reconexão. A foto que mostra onde cortar é muito útil para usuários de bricolage.
Isso aconteceu comigo no fim de semana passado! Acontece que também esqueci que você precisa reconectar os fios positivo e negativo corretamente após o corte. O diagrama neste artigo teria me poupado uma hora de solução de problemas.
Ótima leitura! Com a aproximação da Feira de Iluminação HKTDC em Hong Kong, muitos importadores estão adquirindo produtos LED da China. Oferecemos preços direto da fábrica e serviços OEM/ODM. É um prazer discutir a cooperação com atacadistas e empreiteiros de projetos.
As an electrical contractor in Vietnam, I found this article very practical. We specify Lightstec LED products for our installations.