“My LED strip lights changed color after my renovation. One section looks dimmer and more yellow than the rest. Is the strip faulty?”
This is one of the most common questions our customers ask after a renovation. Before you blame the strip or request a replacement, let us explain what usually really happened – and why it is almost never a quality defect.
In most cases, the LED strip itself is perfectly fine. The color change you see is caused by something that happened during painting – paint that landed on the surface of the LEDs and blocked part of their light output. In this guide we walk through a real customer case, explain the root cause, show you how to tell paint damage apart from a real defect, and give you practical steps to protect your LED strips the next time you paint.
A Real Customer Case: “My LED Strip Changed Color”
A customer finished renovating their office and immediately noticed that the recessed LEDストリップライト installed in the ceiling no longer looked uniform. Some sections appeared dimmer, warmer and slightly patchy, while others remained crisp and bright. They contacted us convinced that the strips were defective.
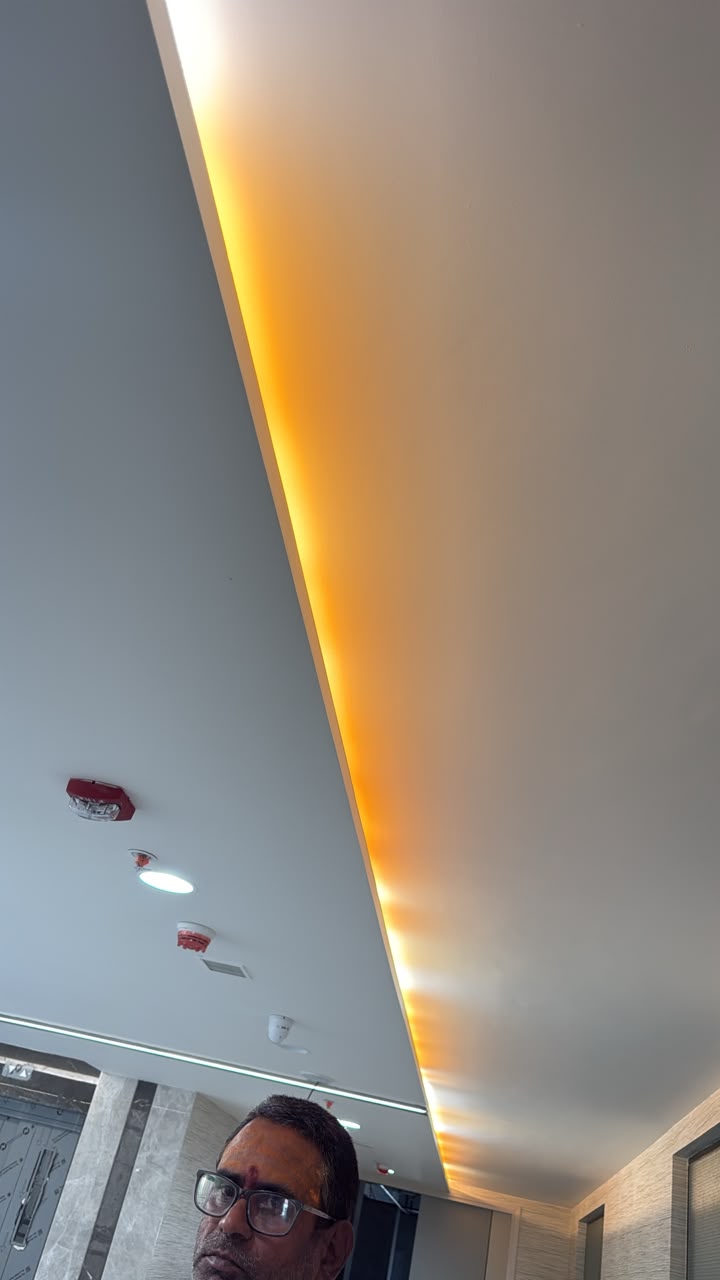
Here is what the installation looked like during construction – the strip was mounted in the ceiling profile first, and the surrounding walls and ceiling were painted afterwards:
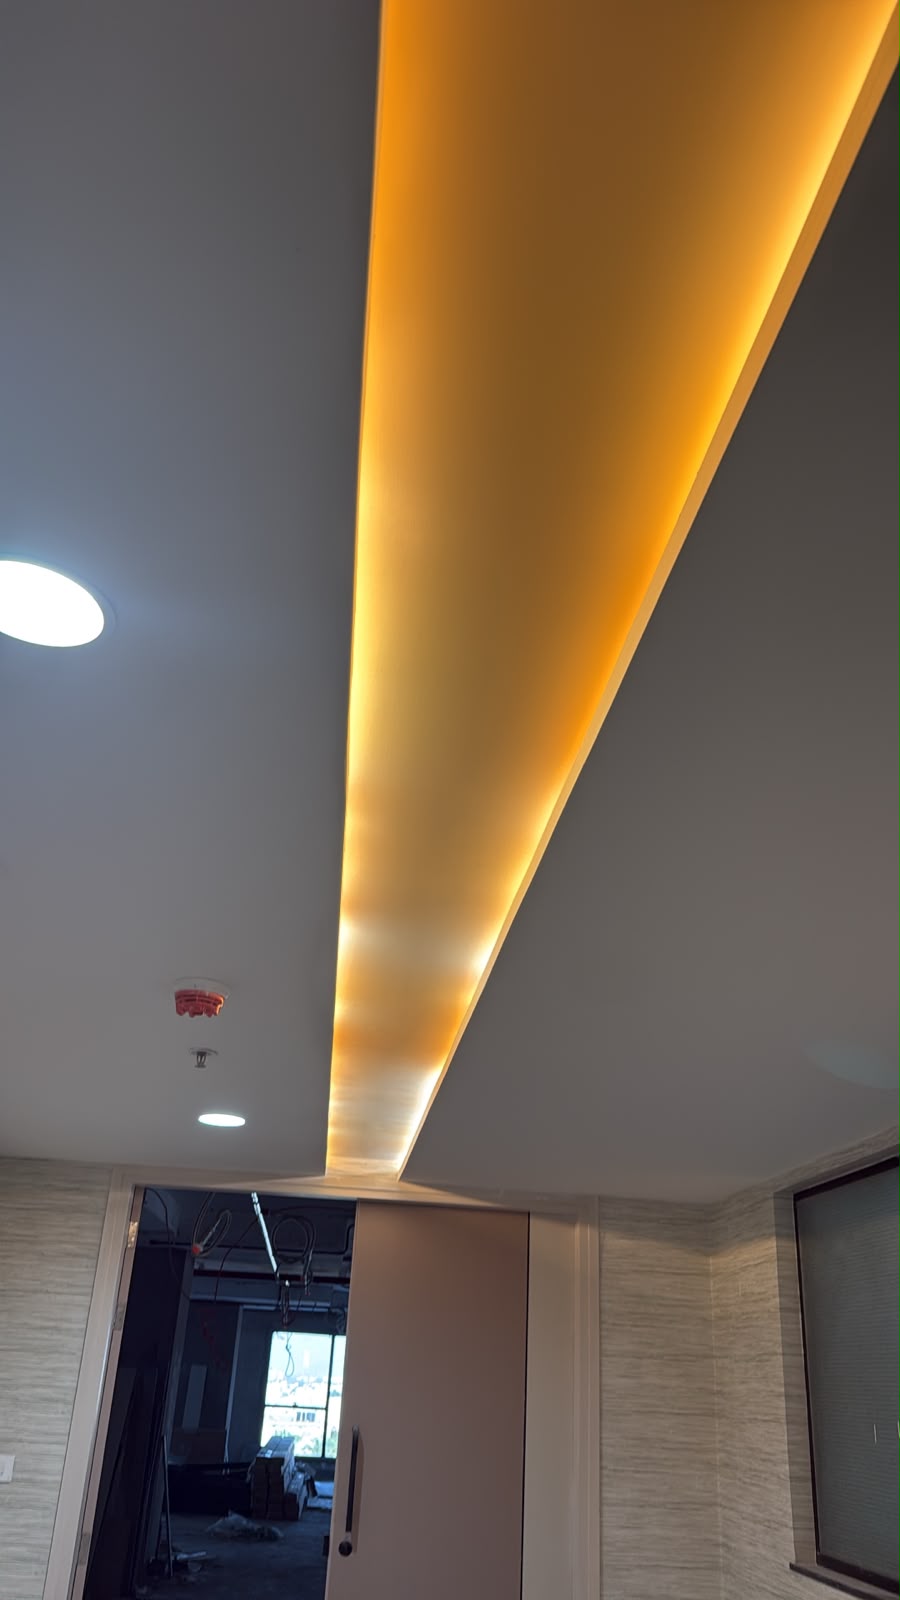
Here is the same type of installation after completion – the strip is intact and producing light, but where paint reached the diodes you can see the tell-tale patchy, mixed color temperature:
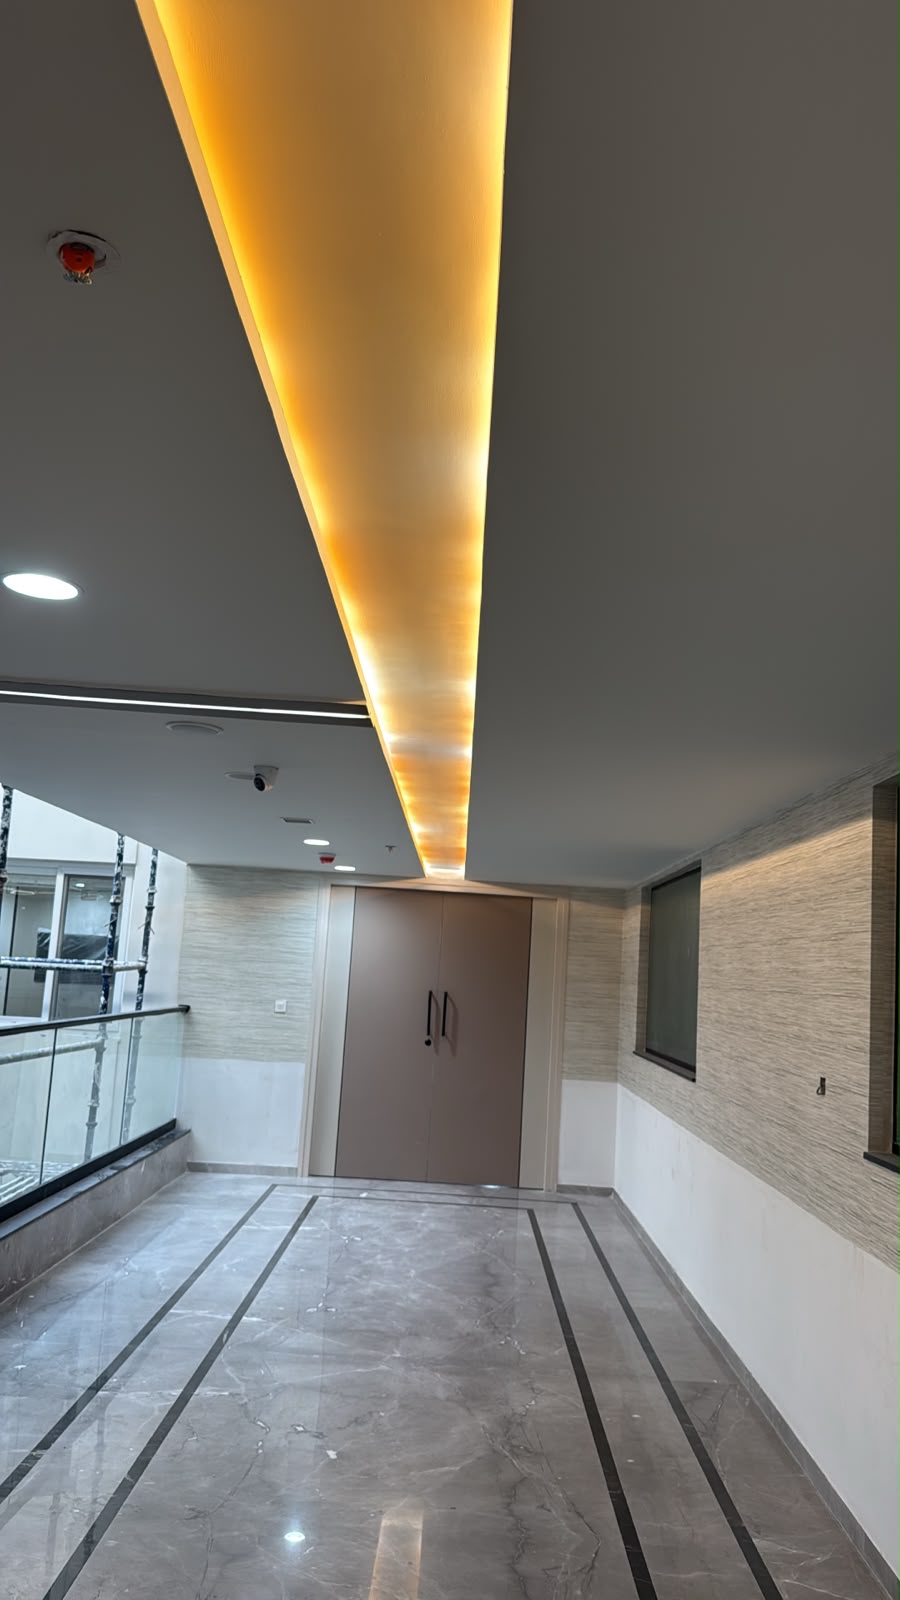
When we examined the photos, the strips were working correctly. The uneven appearance had an external cause – not a fault in the LED product.
What Actually Happened: Paint on the LED Diodes
The root cause is simple: the strip was installed before painting, and during the painting process paint mist or droplets landed directly on the surface of the LED diodes。
A white LED produces its color temperature through a small phosphor coating on the chip. When paint covers even a tiny part of that surface, it blocks and filters the light that passes through. Some diodes end up slightly covered and look dimmer or yellower; others stay clean and remain bright. The result is exactly what the customer saw – uneven brightness and mixed color temperature across the same strip。
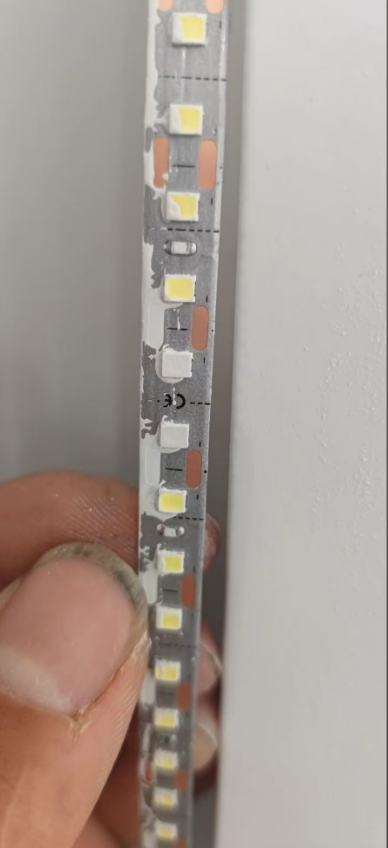
Each LED diode is a tiny optical component. Even a microscopic film of paint on the lens or the phosphor layer changes how the light is emitted. This is why the change often looks patchy and inconsistent rather than a uniform fade – because the paint landed unevenly on the diodes.
Why This Is Not a Quality Defect
This is important: the LED strip has not failed. The chips, the soldering, the driver and the circuit are all intact. The light output from the diode itself is unchanged – what changed is that paint now filters and blocks part of that light.
You can confirm this yourself with a simple test. If you gently wipe a clean area of the strip with a soft, dry, lint-free cloth (never wet, never with solvents while powered on), the covered diodes may brighten noticeably. The color temperature of a quality strip is fixed at the factory and does not shift on its own after a short period of use – aging, voltage drop and a few other causes are real, but paint contamination is by far the most common one right after a renovation.
For context, uneven color along a strip can also be caused by voltage drop on long runs, a mismatched power supply, or mixing strips from different batches – but none of these apply to a strip that was working evenly before painting. If the strip looked uniform when first switched on and only changed after the paint job, the paint is almost certainly the cause.
How to Tell Paint Damage From a Real Defect
| Symptom | Paint damage (not a defect) | Real defect |
|---|---|---|
| Where the change appears | Random, patchy spots or areas close to where painting happened | Often a whole section, the far end, or one single dead LED |
| Appearance on close look | Fine film or droplets of paint visible on the LED surface | Clean surface; a diode is dead or uniformly dim |
| Does gentle dry cleaning help? | Usually yes – covered diodes brighten | No change |
| When did it start? | Only after the painting / renovation | From the start, or after prolonged use |
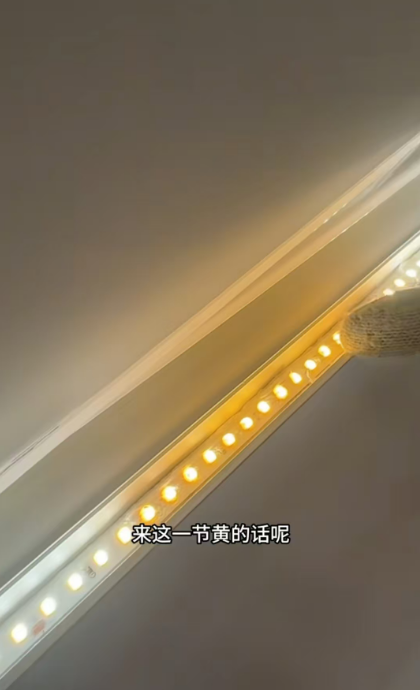
Prevention: Protect Your LED Strips While Painting
The good news is that this is completely preventable. Follow these rules every time you paint near an installed LED strip:
The simplest and safest order is to finish all painting, let it fully cure, and only then install the LED strip. This completely removes any risk of paint landing on the diodes.
If the strip is already mounted, cover it completely with plastic sheeting, masking tape or painter’s tape before any painting begins. Pay extra attention to the LED surface – tape a protective film directly over the diodes and the diffuser.
Installing strips inside an LEDアルミニウムプロファイル with a cover/diffuser protects the diodes from overspray and dust during construction, and gives a cleaner finished look.
Use tape and drop cloths to shield the whole recess, the power supply, and all connectors – not just the visible part of the strip. Overspray drifts and settles on everything nearby.
Keep the protection in place until the paint has fully cured. Even after it looks dry, solvent residue can transfer onto the strip if you handle it too soon.
What to Do If Paint Has Already Hit the Strip
If paint has already landed on the diodes, here is how to assess and handle it safely:
Turn the strip off and let the paint dry completely before touching it. Never wipe the strip while it is powered on.
Carefully wipe the surface with a soft, dry, lint-free cloth to remove any dry film or residue. Do not use water, alcohol or solvents unless the manufacturer approves it, as they can damage the coating or the connectors.
Power on again. In many cases the covered diodes brighten once the film is removed. If the paint has bonded hard and cleaning does not help, the affected section may need to be replaced – this is a cosmetic/installation issue, not a product warranty claim.
Follow the prevention steps above on any future painting work. Good installation practice is the best guarantee of a uniform, lasting result.
推奨LEDストリップ製品
Need a reliable LED strip for your project? Lightstec offers factory-direct strips with stable color temperature, consistent CCT binning and strong quality control. Click any product to view specifications and request a quote:


よくある質問
White LEDs can shift slightly with age and heat, but a sudden, patchy change right after painting is almost always paint contamination rather than normal aging. Aging is gradual and affects the whole strip fairly evenly.
You should never paint over an installed LED strip. Paint blocks the light output, changes the color temperature, increases heat build-up, and can damage the diffuser or coating. If you must work around it, cover it completely instead of painting over it.
Because the paint landed unevenly – some diodes are covered more than others. On a clean strip, uneven dimness toward the far end usually points to voltage drop on a long run, which is a wiring/power question rather than a paint issue.
No. Paint contamination is an installation/environment issue and is not a product defect, so it is not covered by the warranty. Quality strips from Lightstec are tested for stable CCT and soldering at the factory – the product itself has not failed.
Paint first and install the strip last, or fully cover the installed strip with plastic sheeting and painter’s tape, especially over the LED surface. Using a recessed LEDアルミニウムプロファイル with a diffuser also shields the diodes from overspray.
Only use a dry, soft, lint-free cloth and only when the strip is powered off. Water, alcohol and solvents can damage the connectors, coating or phosphor layer. If dry wiping does not restore the brightness, replace the affected section.
Planning a renovation? Get the right LED strip.
Talk to our lighting team for advice on installation order, profiles and protection for a uniform, lasting result.

もっと詳しく知る 間違いを犯す前に教えてくれる人が少ない、プロ主導のクラス。