
Under-cabinet LED lighting makes food prep safer, showcases a backsplash, and adds a premium feel to any kitchen. But the difference between a DIY that looks professional and one that looks unfinished often comes down to one choice: straight U-channel vs. a corner (V-angle) LED channel.
A corner channel sits at the junction where the cabinet bottom meets the wall. The LED strip tilts at 45 degrees, washing light across the countertop instead of shining straight down onto your knees. This guide walks through every step: choosing the right profile, handling tricky 90-degree cabinet corners, wiring to a driver, and avoiding the mistakes that cause callbacks.
Bij Lichttec, we manufacture corner LED aluminum profiles for under-cabinet, shelf, and furniture lighting. Here is everything we have learned from hundreds of kitchen installations.

Wat is een hoek-LED-kanaal?
A corner LED channel is an aluminum extrusion shaped at a 45-degree angle (V-profile) designed to sit where two surfaces meet – typically the underside of a cabinet and its back wall. The LED strip mounts on the angled face, so light exits at 45 degrees rather than straight down or straight out.
Like all LED channels, it includes a base extrusion, a diffuser cover, mounting clips, and end caps. The aluminum body acts as a heat sink, protects the strip from dust and grease, and gives a clean, finished look.

A 45-degree V-angle corner profile with black anodized finish
Why Use a Corner Channel Under Cabinets?
Straight U-channels mounted flat on the cabinet bottom shine light straight down – onto the front edge of the counter, your hands, and your knees. A corner channel tilts the light 45 degrees toward the back of the countertop, exactly where you chop vegetables and read recipes.
| Factor | Corner (45°) Channel | Straight U-Channel |
|---|---|---|
| Lichte richting | 45° toward countertop work area | Straight down (on knees/cabinet edge) |
| Best position | Rear underside, where cabinet meets wall | Front edge, or flat shelf surfaces |
| Taakverlichting | Even, shadow-free wash across counter | Pool of light directly below fixture |
| Visibility | Hidden in the corner, nearly invisible | Visible as a bar on the cabinet bottom |
| Beste voor | Kitchen counters, work surfaces, shelving | Display shelves, wardrobe interiors, plain surfaces |
For kitchen under-cabinet lighting specifically, the 45-degree corner channel is the professional choice. It puts the light exactly where you need it and stays out of sight.
Soorten hoek-LED-kanalen
Not all corner profiles are the same shape. Here are the three main configurations:
1. Inside 45° V-Profile
The most common under-cabinet shape. A right-angle triangular extrusion with the strip sitting on the 45-degree face. Mounts in the corner where cabinet bottom meets wall. Available in silver and black anodized finishes.

Standard V-angle corner profile for under-cabinet use
2. Adjustable 30°/60° Profile
A double-sided corner channel that can be flipped to direct light at either 30 degrees or 60 degrees. Useful when you need flexibility – flip it one way for countertop wash, the other for wall/cabinet interior illumination.
3. Recessed Corner Channel
Flushes into a routed groove in the cabinet underside during new construction or renovation. The cleanest look – the diffuser sits perfectly flush with the cabinet bottom. Requires planning before the cabinets are installed.

Recessed corner channel sits flush with the cabinet surface
Tools & Materials Needed
Before you start, gather everything. A mid-installation run to the hardware store is the most common delay.
Materialen
- LED corner channels (cut to length)
- LED strip light (match inner width)
- Diffuser covers (opal/milky recommended)
- End caps (one with wire hole)
- Mounting clips (2 per meter)
- LED driver/power supply
- Wire connectors (2-pin)
Hulpmiddelen
- Tape measure & pencil
- Fine-tooth hacksaw or miter saw
- Drill with small bit
- Screwdriver
- Wire strippers
- Screws (for clips)
- Multimeter (optional but useful)
Stapsgewijze installatie
Step 1: Measure and plan
Run a tape measure along the underside of every cabinet. Note corners, gaps above appliances, and where the driver will live. Add 10% extra for waste and corners. Sketch a simple layout showing where each channel section starts and ends.
Step 2: Choose strip width vs channel inner width
LED strips come in 5mm, 8mm, 10mm, and 12mm widths. The channel inner width should be 1-2mm wider than the strip PCB. A 10mm strip needs a channel with 12-14mm inner width. If the strip is too wide, it will not sit flat; too narrow and it will rattle.
Step 3: Cut channels to length
Use a fine-tooth hacksaw or miter saw. Support the extrusion on both sides to avoid bending. Deburr the cut ends with a utility knife. Cut the LED strip only at marked cut lines (every 50-100mm depending on the model).
Step 4: Install strip in the channel
Clean the channel groove with isopropyl alcohol. Peel the 3M backing on the strip and press it firmly into the center of the channel. Slide in the diffuser cover. Install the end cap with a wire hole on the power-feed end and a solid end cap on the other.
Step 5: Mark and install mounting clips
Hold the channel in position under the cabinet. Mark clip positions every 40-60cm, plus one near each end. Drill small pilot holes, screw in the clips, then snap the channel into place. Make sure the diffuser side faces the countertop.
Step 6: Run wiring and connect driver
Route low-voltage wire from the channel end cap to the driver location (inside a cabinet, above the cabinet, or in a nearby closet). Red wire to positive (+), black to negative (-). Do not reverse polarity. If dimming is desired, insert the dimmer between the strip and the driver.
Step 7: Test before final assembly
Before clipping the diffuser fully in place and closing up cabinets, plug in the driver and test every section. Look for dark spots, dead LEDs, or loose connections. Fix issues now – after installation they are much harder to reach.
Step 8: Snap on diffuser and end caps
Once everything works, press the diffuser cover into the channel until it clicks home. Install solid end caps. Wipe off fingerprints. You are done.
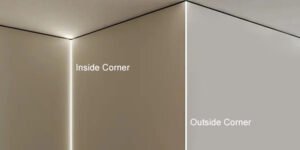
Handling 90-Degree Cabinet Corners Without Dark Gaps
The single most common complaint after under-cabinet LED installation is a dark spot or gap at inside corners. Here are three ways to solve it, from simplest to most professional:
Method 1: L-shaped connector (easiest)
Cut the strip at the marked cut line on both sides of the corner. Use an L-shaped 90-degree PCB connector to bridge the two ends. The channels run straight into the corner on both walls and meet cleanly. Best for DIY installations.
Method 2: 45-degree miter cut (professional)
Cut both channel ends at 45 degrees so they form a perfect inside corner. Solder the strip wires across the joint. This produces the cleanest continuous line with no visible connector. Requires a miter saw and soldering skills.
Method 3: Continuous corner channel
Use a dedicated inside-corner corner profile that wraps the angle in one piece. The strip runs through the corner without splicing. This is the most elegant solution but requires the strip to bend at a gentle radius inside the corner extrusion.

Clean continuous light line around cabinet corner
Choosing the Right Strip & Diffuser
For under-cabinet task lighting, these are the specs that matter:
| Spec | Aanbeveling | Waarom |
|---|---|---|
| CCT | 3000K warm white | Best color for food; warm and inviting |
| Dikte | 60-120 LEDs/m | Higher density = smoother light, fewer dots |
| Spanning | 24V (runs over 5m) | Less voltage drop on long runs |
| Verspreider | Opal/milky white | Best dot-hiding; 80-90% light output |
| CRI | RA90+ | Food and skin look natural, not washed out |
For more on strip selection, see our guide to LED strip light options and our LED baseboard lighting guide for related installation tips.
Power Supply Sizing: The 80% Rule
Never run a driver at 100% capacity – it overheats and shortens its life. Follow this formula:
Driver wattage ≥ (total strip watts) × 1.2
Example: You have two 2-meter runs of 10W/m strip. Total strip power = 4m × 10W = 40W. Required driver = 40W × 1.2 = 48W. Choose a 50W or 60W driver.
Mount the driver in a ventilated spot inside a cabinet or above the cabinet line. Never seal it inside an enclosed drawer. IP20 drivers are fine for dry cabinet interiors; use IP65 waterproof drivers only near sinks or outdoor kitchens.
Veelvoorkomende fouten die u moet vermijden
Not testing before closing up. Always power on the strip before installing diffusers and closing cabinets. Reaching up under a cabinet to swap a dead strip after the fact is miserable.
Channel too narrow for the strip. If the strip is 12mm wide and the channel inner width is 10mm, the strip will not sit flat and will glow unevenly. Always measure the PCB width.
Ignoring heat dissipation. High-density strips (120+ LEDs/m) run hot. The aluminum channel is the heat sink – never stick the strip directly to wood without a channel.
Reversing polarity. Red is positive, black is negative. Reverse the wires and the strip simply will not light up. Check before powering on.
Driver too small. A driver sized exactly to the strip wattage runs hot and dies early. Add 20% headroom.
Bending the strip too sharply. LED strips have a minimum bend radius. At 90-degree corners, cut and re-splice rather than forcing a sharp crease.
Wrong diffuser. A clear diffuser reveals every LED dot. A smoked diffuser loses 30-50% brightness. For task lighting, opal/milky is the sweet spot.
Kitchen Under-Cabinet Design Tips

Warm under-cabinet light highlights the backsplash and countertop
Mount toward the back. Put the corner channel at the rear of the cabinet underside (where it meets the wall). This aims light at the back of the countertop where you prep food, not at your face.
Combineer met dimmen. Under-cabinet lighting should be bright for cooking but soft for dinner. A dimmer or smart switch transforms it from task light to ambiance. See our guide to 8 dimming methods.
Hide the driver. Put it in a cabinet with a louvered door, on top of a tall cabinet, or in a nearby pantry. Keep it accessible for future service.
Consider color temperature. 2700-3000K is warm and inviting for kitchens. 4000K+ looks clinical and washes out food colors. Stay in the 2700K-3500K range.
Backsplash glow. The corner channel also washes light up onto the backsplash, turning your tile or stone into a design feature. This is one of the most dramatic returns on investment in kitchen lighting.

Light wash on the backsplash adds depth and warmth
Veelgestelde vragen
Can I bend LED strips around cabinet corners?
You can make a gentle curve (radius 50mm+), but a sharp 90-degree bend will damage the PCB. For inside corners, cut the strip at the marked cut line and use an L-connector or solder a short jumper wire between the two sections.
Do I need a corner channel, or can I just use a straight U-channel?
A straight U-channel works if you mount it flat on the cabinet bottom. But the light shines straight down onto the counter edge, not the work surface. A 45-degree corner channel aims light where you actually cook and prep.
How many mounting clips do I need?
Plan on one clip every 40-60cm, plus one near each end. A 2-meter run needs about 4-5 clips. Too few and the channel will sag or rattle.
Can I cut LED corner channels to length?
Yes. Use a fine-tooth hacksaw or miter saw with a metal-cutting blade. Cut slowly to avoid deforming the extrusion. Deburr the ends and install end caps afterward.
What if my LED strip is wider than the channel?
Do not force it. A strip that is too wide will not sit flat and will create hot spots. Either return the strip for a narrower width, or choose a channel with a wider inner width. Measure the PCB before ordering.
Should I use 12V or 24V for under-cabinet lighting?
Use 24V if your total run exceeds 5 meters. 12V strips suffer noticeable voltage drop beyond 3-4 meters. Most kitchens are under 5 meters total, so 12V works fine, but 24V gives you more headroom.
How do I hide the wires?
Route low-voltage wire through the gap between the cabinet and wall, or use white cable channel covers that match the cabinet. The driver hides inside a cabinet. The only visible wire should be between the last cabinet and the driver location.
Laatste gedachten
Installing a corner LED channel under your kitchen cabinets is one of the highest-impact lighting upgrades you can make. The 45-degree angle puts light exactly where you work, the aluminum channel keeps everything clean and professional, and modern LED strips last over 50,000 hours.
The key is planning: measure carefully, choose the right strip width for the channel, size the driver with 20% headroom, and test everything before closing up. Do that and your under-cabinet lighting will look like a pro installed it.
Hoek-LED-kanalen nodig voor uw project?
Factory-direct corner, surface, and recessed profiles in silver or black. Custom lengths available.
Recommended Products for Under-Cabinet Projects
Klik op een product om de specificaties te bekijken en een offerte aan te vragen:

Black Corner LED Channel
45-degree V-angle profile with black anodized finish. Perfect for dark modern kitchens.
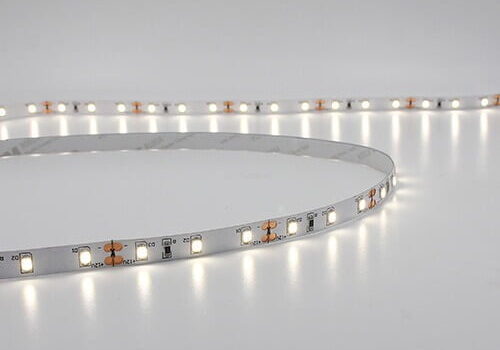
SMD2835 LED-striplicht
60 LEDs/m, 3000K warm white. Ideal under-cabinet ambient and task lighting.
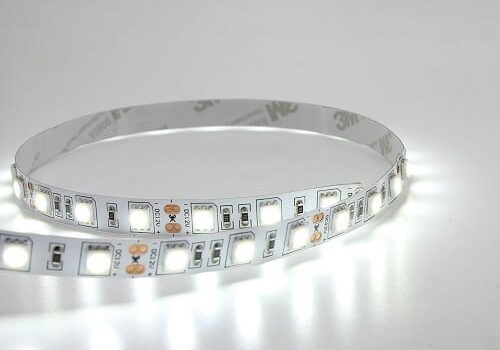
SMD5050 LED-striplicht
Brighter output for larger kitchen runs where more lumens are needed.

Furniture LED Profile
Surface-mount channel for cabinets, shelves, and wardrobe interiors.

Over auteur: JerryHu
Jerry Hu is the founder of Lightstec, a China-based LED strip light and aluminum profile manufacturer. He has helped contractors, kitchen designers, and brand owners worldwide source reliable LED components since 2009.
Meer informatie Professionele lessen die minder mensen u vertellen voordat u een fout maakt.
Great guide! We just installed V-angle channels under our upper cabinets and the difference is night and day. The tip about measuring strip width vs channel inner width saved me – I initially ordered 12mm channels for 10mm strips and they would have been too loose. Ended up going with 10.5mm inner width channels and everything fits perfectly.
As a kitchen designer, I appreciate the comparison between corner and straight channels. Many homeowners ask why they can’t just stick a strip flat to the cabinet bottom. The answer is exactly what this article explains – light ends up on the wrong surface. The 80% power rule is also something I need to emphasize more with clients who try to skimp on driver size.
Installed about 12 meters of your corner channels last week for a client’s kitchen remodel. The L-connector method for corners worked perfectly – no dark gaps at all. One addition for DIYers: test the strip with a battery pack before installing it in the channel, that way you know it works before you’ve sealed it inside the aluminum.
Quick question – can I dim these corner channel lights with a regular wall dimmer switch? We want to use a standard rotary dimmer in the kitchen but I’m worried it won’t work with LED strips. Do we need a special low-voltage dimmer, and where does it go in the circuit?
This is the most practical under-cabinet LED guide I’ve read. The section on handling 90-degree corners without dark gaps is exactly what every homeowner struggles with. We’ve been using Lightstec profiles for commercial projects for years and their black anodized finish is noticeably better than the cheap imports we used to buy.