Seamless Inside & Outside Corner Lighting: The Complete LED Corner Molding Guide
Inside and outside corners are where a room can look either perfectly finished or noticeably awkward. A corner molding — the trim that protects and defines wall corners — has traditionally been purely protective. Add an LED channel and the corner becomes lighting: a single continuous light line that removes shadows from recessed corners, makes protruding corners safer to walk past, and gives rooms a clean architectural glow. This guide explains how to realize seamless inside and outside corner lighting with aluminum LED corner moldings, how drywall and tile versions differ, and how to install them for a truly seamless result.
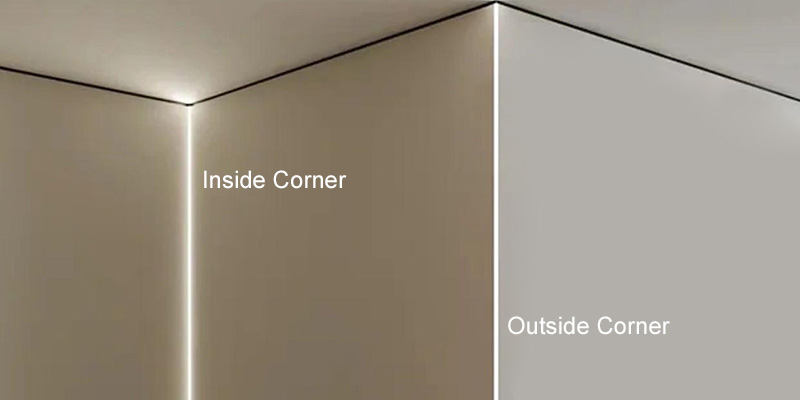
What Are Inside and Outside Corners?
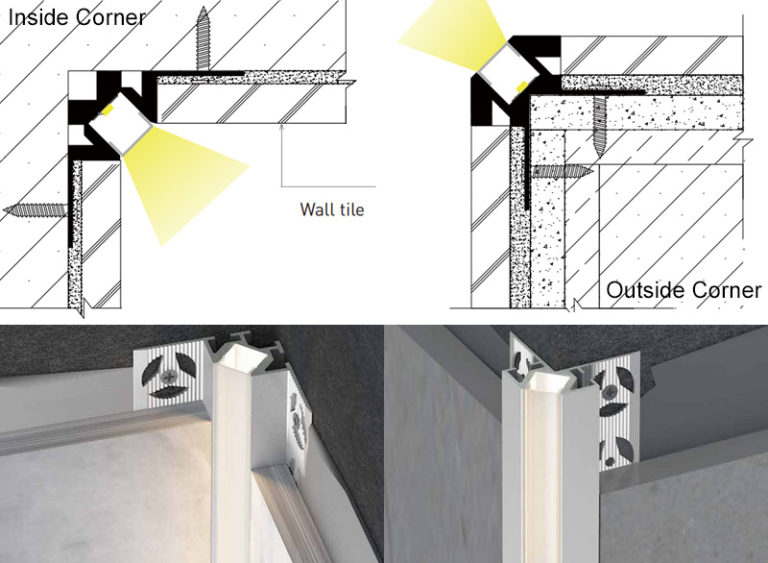
Inside corner and outside corner are the two basic edge types in any three-dimensional space. They describe the lines where walls meet walls, or walls meet ceilings — and they are the hardest spots to light cleanly.
Every home is full of both. Doorways, stairwells, hallways, living room walls and bathroom partitions create dozens of inside and outside corners. Designers treat them as architectural lines: protect the fragile edge, cover the joint, and — with LED corner molding — turn the line itself into light.
Why Add Lighting to a Corner?
Corners have two classic problems, and lighting answers both. Inside corners collect shadow — you can see this in popular ceiling crown molding lighting, where a light line visually lifts the room. Outside corners collect damage — they get rubbed, bumped and chipped by people, carts and furniture.
An aluminum LED corner molding combines the protective role of a corner guard with a built-in lighting channel. The result is a profile that reinforces fragile drywall or plaster corners while projecting a soft, even light line in both directions. It illuminates the space three-dimensionally, softens the sharpness of the corner, and turns what was an awkward architectural joint into a deliberate design feature.
Drywall vs. Tile Corner Moldings
LED corner moldings fall into two installation families. The right choice depends on the wall finish: drywall/plaster walls get a plaster-in profile; tile walls get a tile profile designed to sit between tiles. They share the same 6063-T5 aluminum construction and the same purpose — seamless corner lighting.
| Caratteristica | Drywall / Plaster-in Molding | Tile Wall Molding |
|---|---|---|
| Installazione | Slotted into the corner, fixed, then skimmed with plaster | Fixed to the corner, then tiled around it |
| Best time to install | During drywall finishing, before final paint | During tiling, before grouting |
| Typical rooms | Living rooms, bedrooms, corridors, ceilings | Bathrooms, kitchens, balconies, shower walls |
| Finished look | Fully flush with the plaster — almost invisible | Sits neatly between tile edges |
Inside & Outside Corner Molding Types
Corner moldings are supplied in matched inside/outside pairs, sized by the inner width of the LED channel. That width decides which LED strip fits inside. Narrow channels (about 5 mm) take slim 8 mm strip lights; wider channels (10–15 mm) take standard 8–10 mm strips with a smoother, brighter output.
Drywall Plaster-in Corner Moldings (6063-T5 Aluminum)
| Inside | Outside | Inner Width for LED | Colore |
|---|---|---|---|
| 3434B | 3434 | 5.3 mm | Silver, Black |
| 3838B | 3838 | 10.3 mm | Silver, Black |
| 3939B | 3939 | 14.1 mm | Silver, White, Black |
| 4141B | 4141 | 15.1 mm | Silver, White, Black |
| A039 | A040 | 12.3 mm | Silver |
Tile Wall Corner Moldings (6063-T5 Aluminum)
| Inside | Outside | Inner Width for LED | Colore |
|---|---|---|---|
| 4040B | 4040 (with ALU edges) | 10.3 mm | Silver, Black |
| 4242B | 4242 | 13.6 mm | Silver, White, Black |
| — | 1616L | 10.6 mm | Silver, Black |
All profiles are available in 1 m (3.28 ft) and 2 m (6.56 ft) lengths, and longer or custom lengths can be produced for continuous runs. When the LED is switched off, only a clean white or black diffuser remains visible — some profiles deliberately leave two slim aluminum edges framing the light line.
How to Achieve Seamless Corners
“Seamless” means two things: the molding itself disappears into the wall, and the light line stays continuous around the corner with no dark gap. Both come down to preparation and cutting.
How to Install Drywall (Plaster-in) Corner Molding
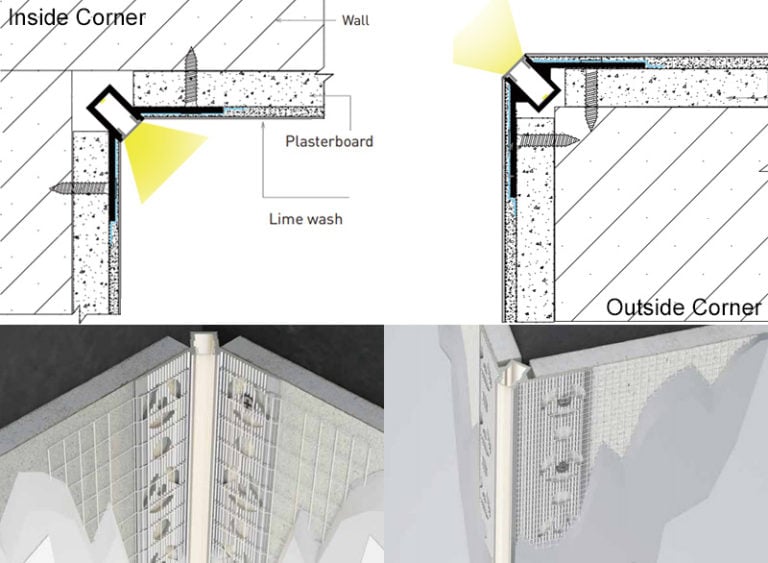
Inside and outside corner moldings for drywall are installed the same way. Do this stage while the walls are being finished — the profile is designed to disappear into the plaster.
- Cut the slot. According to the size of the corner molding, cut a clean slot along the inside or outside corner where the profile will sit.
- Embed and fix. Press the LED corner molding into the slot and fix it firmly with screws so it cannot move during plastering.
- Finish the surface. Stick the anti-cracking fiber mesh over the joint, scrape putty or plaster over the flanges, sand smooth, and finally paint the wall.
Once plastered and painted, the profile reads as a crisp architectural line. Install the LED strip and diffuser after painting — this keeps the channel clean and makes wiring far easier.
How to Install Tile Corner Molding
Tile corner moldings work with the tiling itself. The 4040B/4242B inside corner and 4040/4242 outside corner profiles install the same way; the 1616L outside corner profile differs slightly because it only needs fixing on one side.
- Secure the molding. Fix the LED corner molding to the inside or outside corner of the wall, aligned with the planned tile face.
- Tile around it. Lay the tiles up against the profile. The tile thickness must match the molding dimensions so the finished surface stays flush — confirm your tile thickness against the profile spec before ordering.
The same rule applies here: choose an LED strip that fits the inner width, solder joins at corners, and test the light before the final grout and diffuser fit. For wet rooms, pair the channel with an IP65 silicone-coated LED strip and seal the end caps.
Where to Use Corner Lighting
Domande frequenti
Inside corner profiles fit recessed corners such as ceiling-wall junctions; outside corner profiles fit protruding corners such as corridor turns. Both hide the LED and emit a continuous light line — the profile shape matches the geometry of the corner.
Match the strip width to the channel’s inner width: 5.3 mm channels take slim 8 mm strips; 10–15 mm channels take standard 8–10 mm strips with higher LED density for a smoother, brighter line. High-density 120–180 LEDs/m warm white is the popular choice.
Yes, for a seamless result. Measure the actual corner angle, divide by two, and miter-cut the aluminum profiles at that angle (45° for a true 90° corner). Then solder the LED strip at the join instead of bending it.
Tile corner moldings are designed for bathrooms and kitchens. Use an IP65 silicone-coated LED strip inside the channel and seal the end caps to protect against steam and splashes.
Yes. The aluminum profile cuts cleanly with a miter or fine-tooth saw, and standard 1 m / 2 m lengths can be combined for longer runs. Custom lengths can be produced for continuous installations.
Drywall (plaster-in) moldings go in during wall finishing, before final paint. Tile moldings go in during tiling, before grouting. Install the LED strip and diffuser after finishing to keep the channel clean.
Conclusione
Seamless inside and outside corner lighting is one of the most effective ways to make a space feel designed rather than assembled. A well-chosen aluminum corner molding protects the vulnerable edge, hides the LED completely, and leaves a single continuous line of light that kills shadows, guides movement and adds architectural depth. The two decisions that matter most: pick the profile family that matches your wall finish (drywall plaster-in or tile), and take the time to miter-cut and solder the corners properly so the light line never breaks.
Not sure which profile fits your corner? Send the Lightstec team your corner photos, wall material and preferred LED strip — we will recommend the right inside/outside corner molding and lighting combination for your project.
Prodotti consigliati per strisce LED
Fare clic su qualsiasi prodotto per visualizzare le specifiche e richiedere un preventivo:
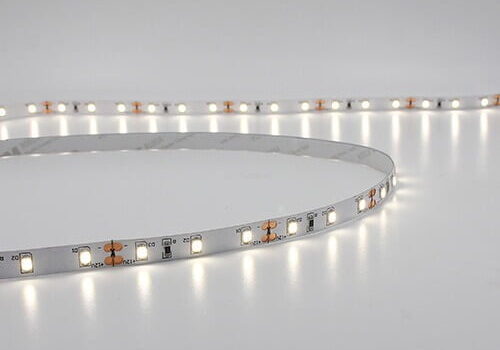
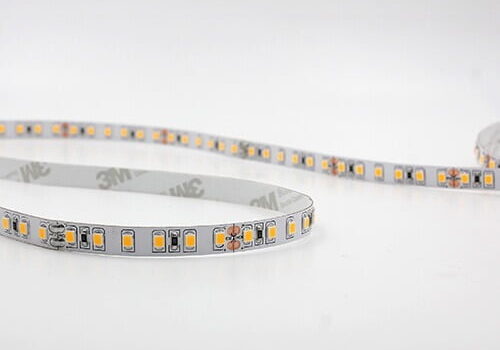
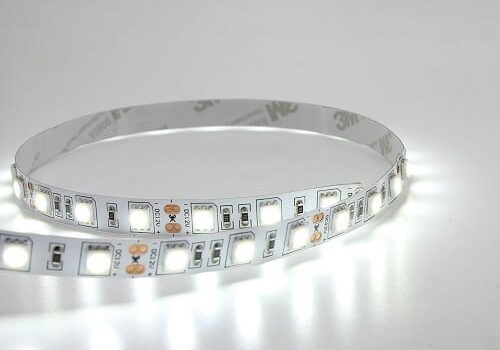


To save you time, we have prepared a PDF catalog with all our latest LED light products, aluminum profiles and corner moldings. Leave your email and get it immediately.

Jerry è il fondatore di Lightstec, un produttore cinese di strisce LED e profili in alluminio. Da oltre 10 anni aiuta architetti, designer e acquirenti di sistemi di illuminazione a scegliere e personalizzare le soluzioni di illuminazione a LED.
Scopri di più lezioni guidate da professionisti che meno persone ti raccontano prima di commettere errori.